The following post will quickly explain how to setup your own DNSCrypt server and take advantages from Adguard to block ads at a DNS level. I’ll be using a KVM-based instance that runs an up-to-date Debian Bullseye (11) installation. Thanks Web Horizon for providing reliable VPS instances, get yours here.
Step 1: Installing DNSCrypt
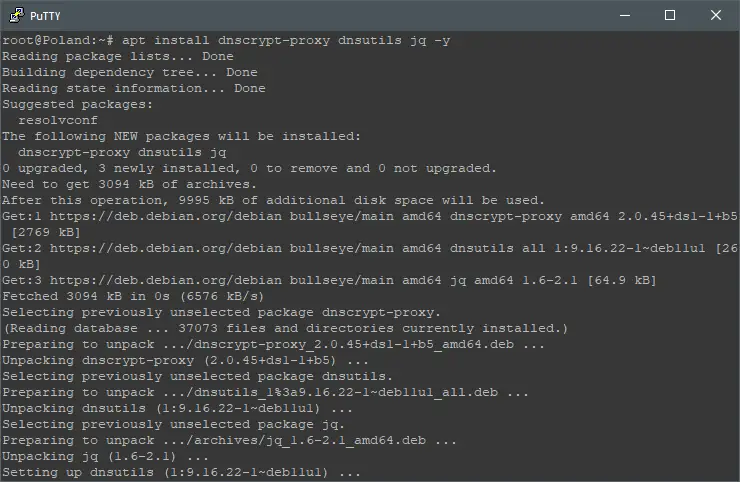
After upgrading your OS installation, install DNSCrypt and some additional utilities by executing this command line:
apt install dnscrypt-proxy dnsutils jq wget nano -y
Step 2: Configuring DNSCrypt
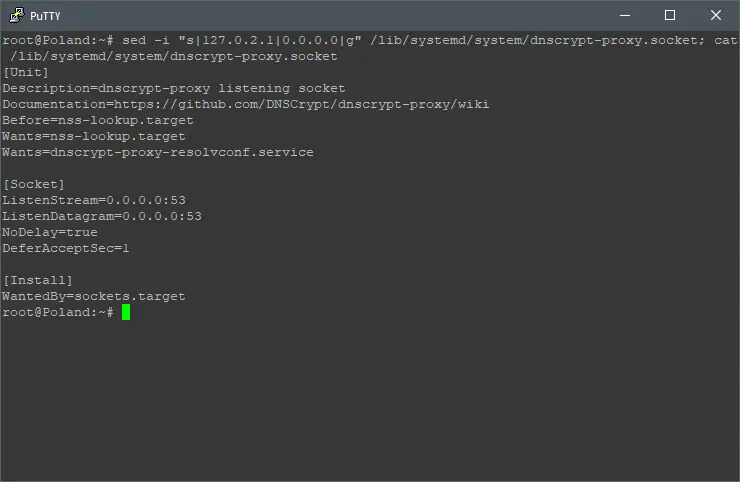
By default, DNSCrypt use the local IP address: 127.0.2.1 to pass-through all the web traffic from the ethernet network interface. Let’s force DNSCrypt to be available on all network interfaces by executing:
sed -i "s|127.0.2.1|0.0.0.0|g" /lib/systemd/system/dnscrypt-proxy.socket; cat /lib/systemd/system/dnscrypt-proxy.socket
Step 3: Locking DNSCrypt
Now let’s lock the resolv.conf file to connect through DNSCrypt permanently, even after reboots, do that by executing:
Due a system protection, the next command line is available here:

Once that’s completed, restart your system by executing:
shutdown -r now
Step 4: Testing DNSCrypt
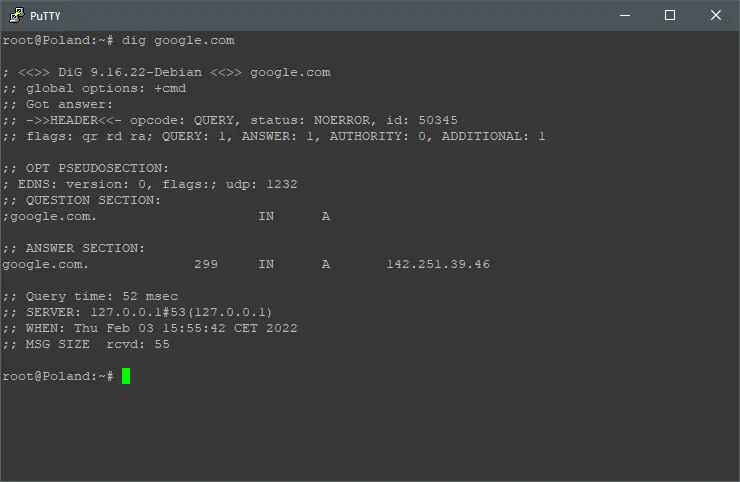
Let’s find out if this is working, first, you can use dig to see if requests are made from DNSCrypt, do that by executing:
dig google.com
You should see the IP address 127.0.0.1 as SERVER.
Optionally, you can check your system DNS resolvers by downloading and executing this custom script:
wget https://raw.githubusercontent.com/macvk/dnsleaktest/master/dnsleaktest.sh; chmod +x dnsleaktest.sh; ./dnsleaktest.sh
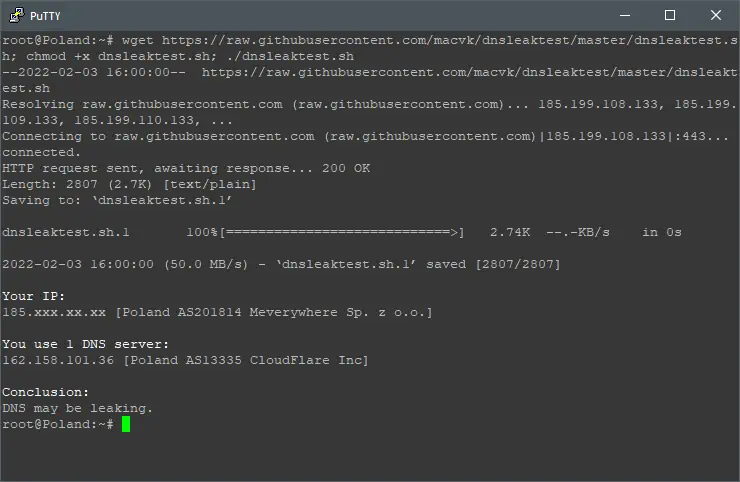
The results should show that your system queries are made by Cloudflare DNS resolvers, which is the default DNSCrypt DNS resolver.
Step 5: Adding Resolvers to DNSCrypt
There are hundreds of DNS resolvers compatible with DNSCrypt, one of them is Adguard, they claim to: Remove ads and protect your computer from malware. Let’s add them to DNSCrypt config file by executing:
nano /etc/dnscrypt-proxy/dnscrypt-proxy.toml
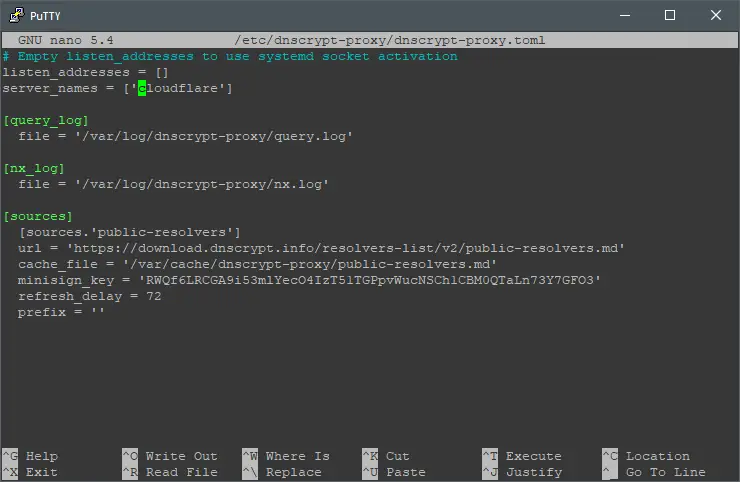
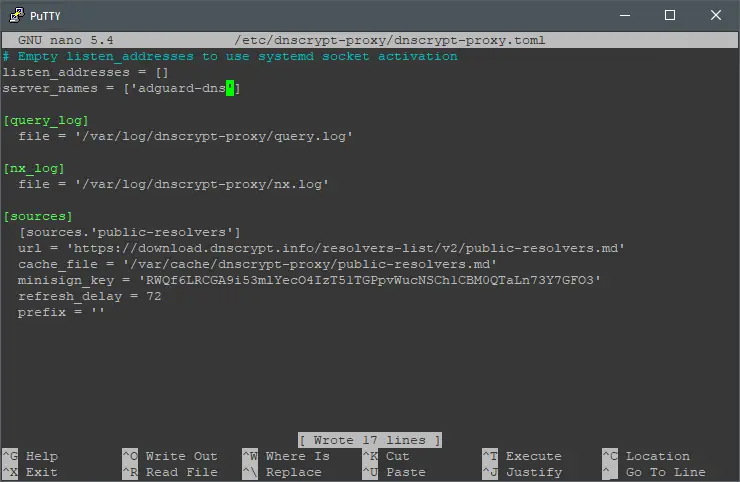
Replace ‘cloudflare‘ with ‘adguard-dns‘ in the server_names fiield. Once that’s completed, restart DNSCrypt by executing:
systemctl restart dnscrypt-proxy
Let’s see the VPS instance public IP address and its current DNS resolvers by executing:
./dnsleaktest.sh
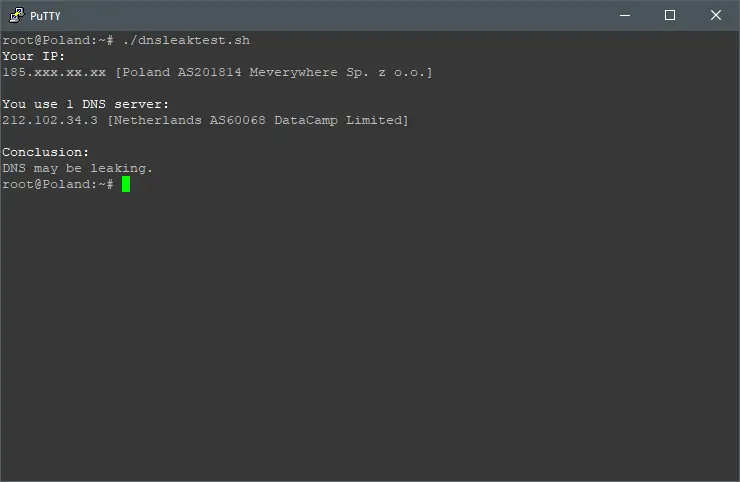
You shouldn’t see Cloudflare DNS resolvers IP addresses anymore.
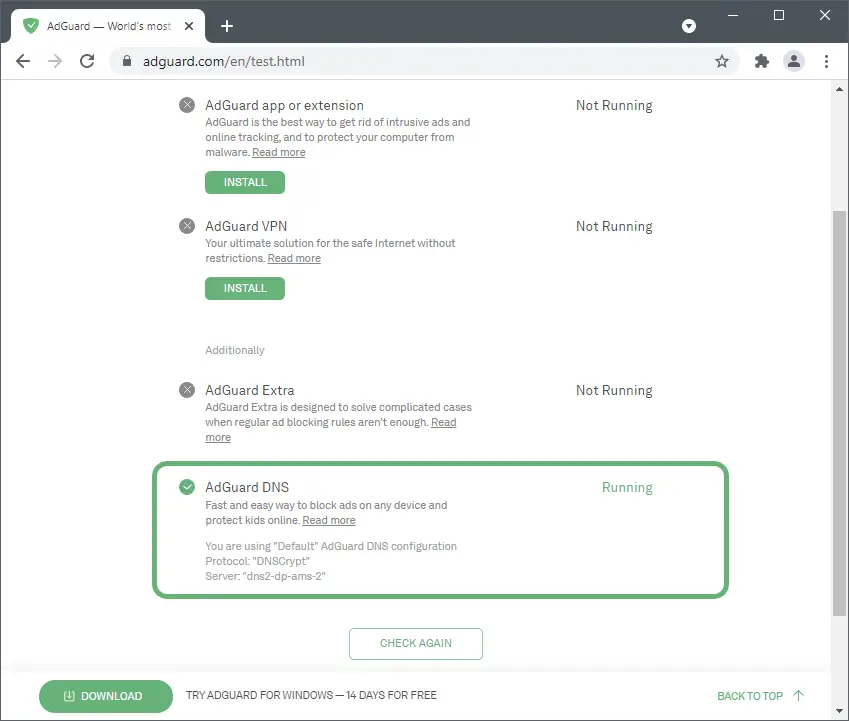
Step 6: Using your VPS Instance as DNS Resolver
As simple as it get, with DNSCrypt you can actually use your VPS instance public IP address as your own DNS resolver. In the previous step you will find the VPS instance public IP address. Once that’s completed, add your VPS instance public IP address to your devices and apps that manage DNS resolvers. Once that’s completed, go to Adguard’s test website that show if you’re using its DNS resolvers.
Note: this step won’t work with NAT-based VPS instances.
Results:
Conclusion:
DNSCrypt can turn your VPS instance to a DNS server, this can be a good alternative to Adguard Home, more simple, with less features but a great option with servers with low resources. I hope this post helped you to setup you own DNS resolver through DNSCrypt. Don’t forget to check WebHorizon amazing deals here.
Sources: