The following post will quickly guide you to set up custom SMTP (Simple Mail Transfer Protocol) servers on Sendy, one of the best self-hosted newsletter platform out there. It is required to have Sendy already installed since this post will not cover its installation. If you don’t have a Sendy installation yet, you can either host it on your email hosting account or you can use a NVMe shared web hosting like this. Sendy’s one-time-fee license can be ordered from here. A dedicated email hosting plan can be ordered from here.
Once your web hosting plan, email hosting plan and Sendy setup are ready, you can continue reading this post. Note: please be careful about spamming, I believe in the best practices to send emails massively to genuine email lists, therefore I assume good behavior on the user/reader end. Be aware that if your email hosting provider detect any type of abuse, your email hosting account will probably be suspended and no refund will be provided.
Step 1: Getting Email Hosting Configuration
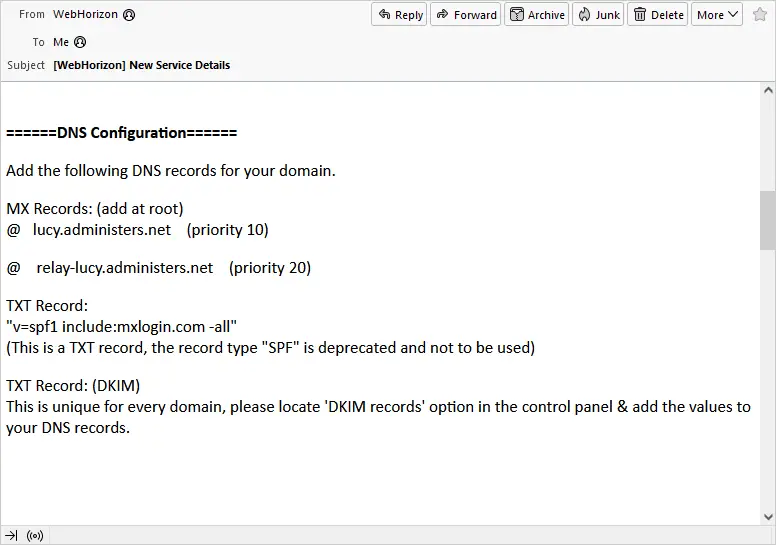
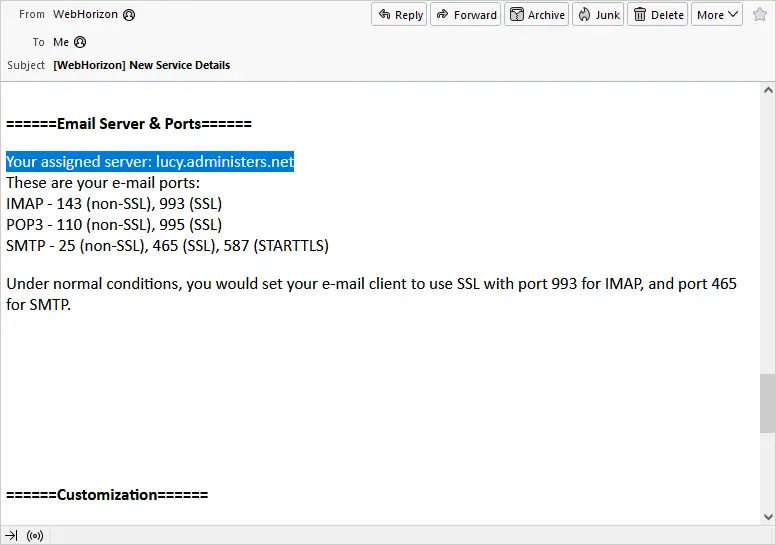
Right after your email hosting account is activated, you will receive an email with a few useful details like: email server and its ports. There is a couple of sections that you will be need it, first: DNS Configuration and second: Email Servers and Ports. Make sure to have those before to continue reading this post.
Step 2: Adding DNS Records
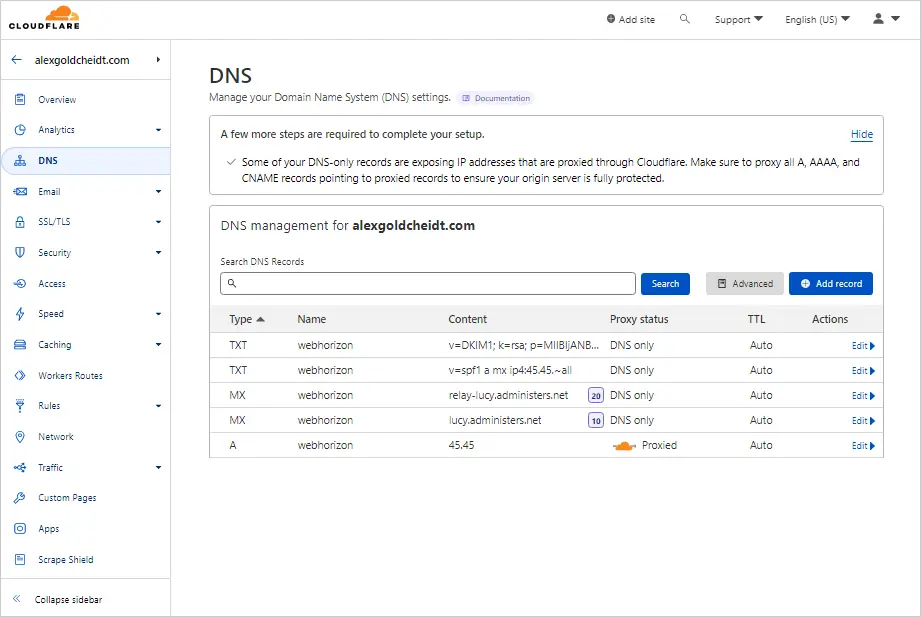
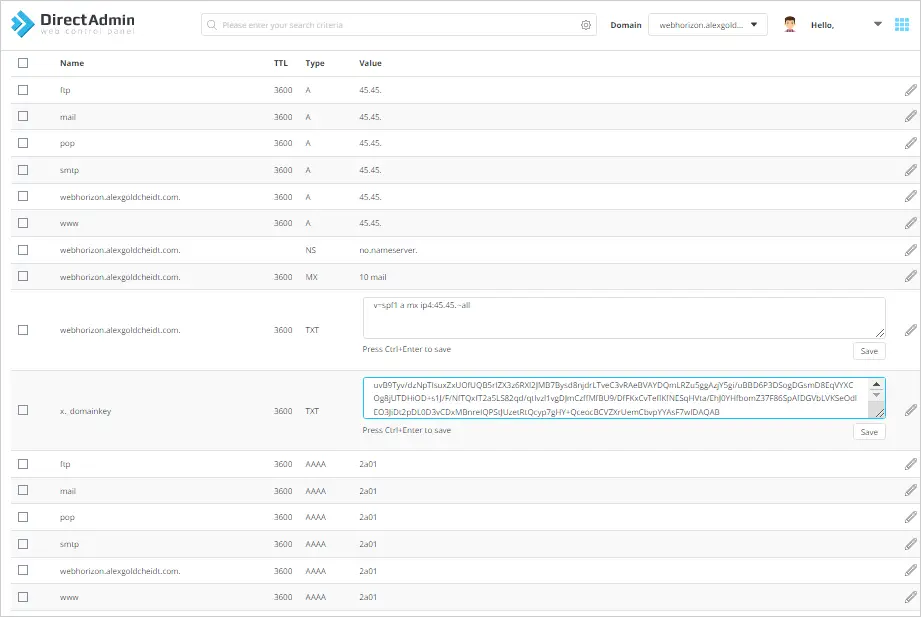
For this post, I’ll be using a subdomain name (webhorizon.alexgoldcheidt.com) and I’ll use Cloudflare as a DNS manager, if you use other DNS manager, don’t worry, these records should work, no matter the DNS manager. There are five records that you need to make this work. First: the “A” record that will contain the IP Address of the email hosting server, you will find it on your email hosting account control panel under: “DNS Management”. The second and third record are “MX”: you will find these on the “Activation Email” from your email hosting provider, see Step 1. The last couple of record are “TXT”: you will find these on your email hosting account control panel under: “DNS Management”. Once you have those five records, move on to the next step.
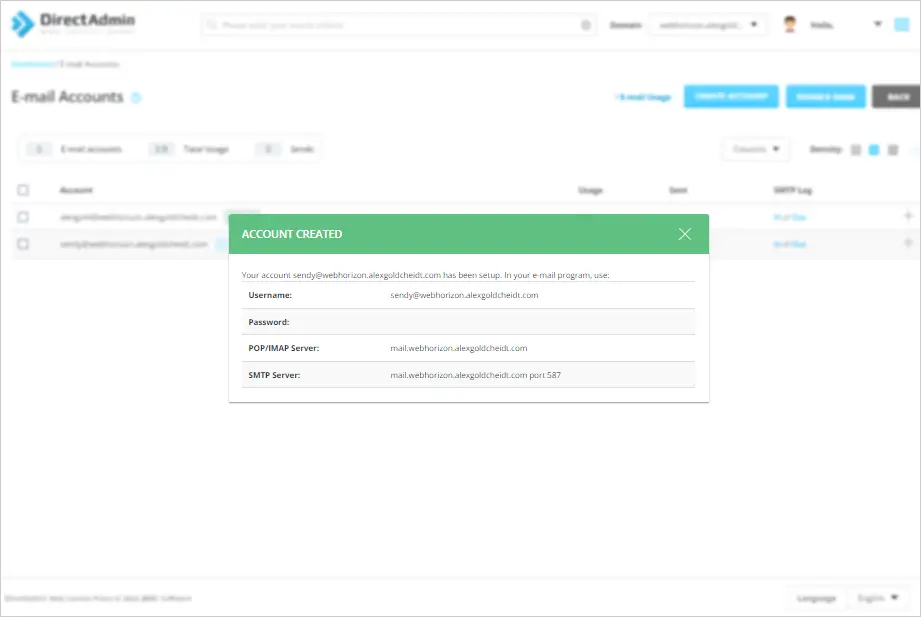
Step 3: Creating a New Email Address
It will be a good idea to create a new email account, do that on your email hosting account control panel under: “Email Accounts”.
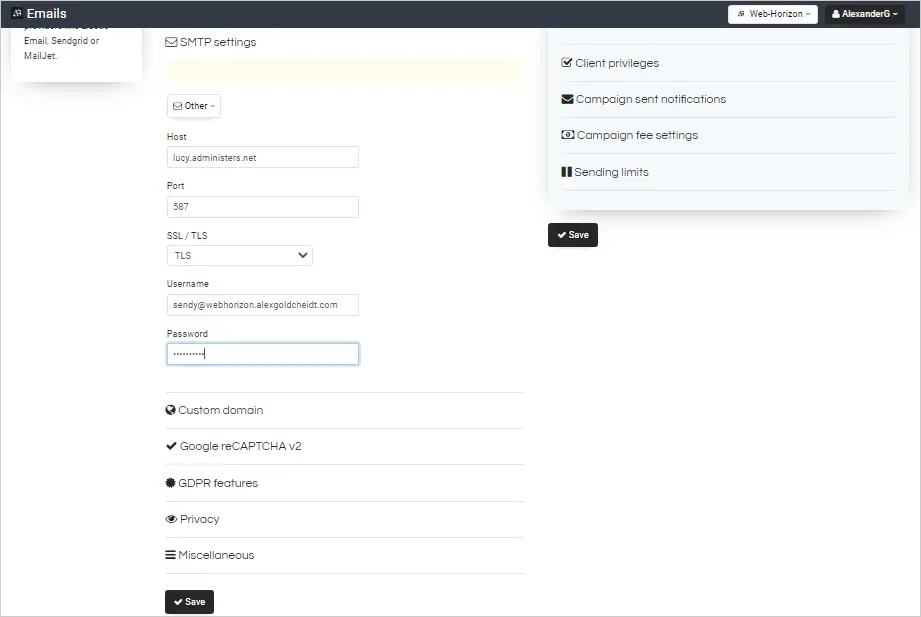
Step 4: Adding Custom SMTP Severs on Sendy
Go to your Sendy installation and create a new brand or modify your already created brand. Custom SMTP servers can be added only by editing brands, it is not available on Sendy Settings. Once there, click: “SMTP Settings”, select: “Other”. Fill out that form, on the “Host” field, copy/paste the server that was assigned to your email hosting account, that information is available in the “Activation Email” from your email hosting provider, see Step 1. The “Port” field should be “587” through “TLS”. The username is the newly created email account along with its password. Once that’s done, click “Save”.
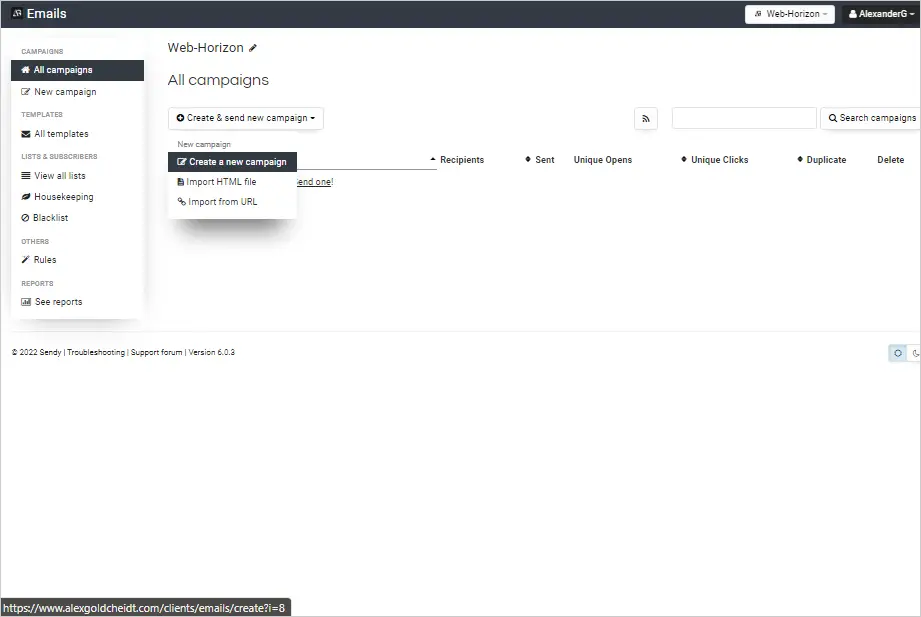
Step 5: Testing Email Delivery
To do a quick test and check that all the configuration is the right one, create a campaign, once that’s done, click “Save and continue”, once in there, input an email address under: “Test send this campaign” and click: “Test send this newsletter”.
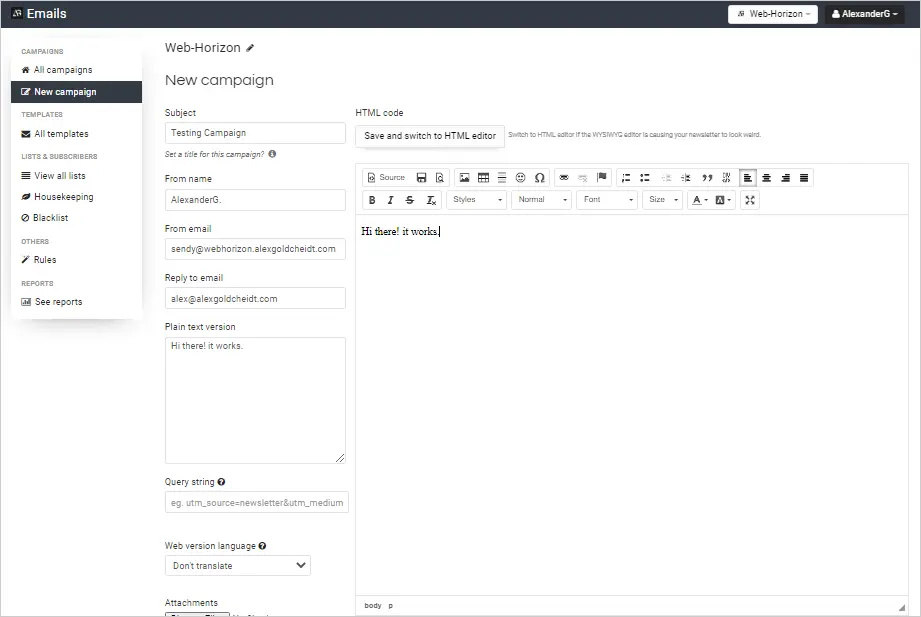
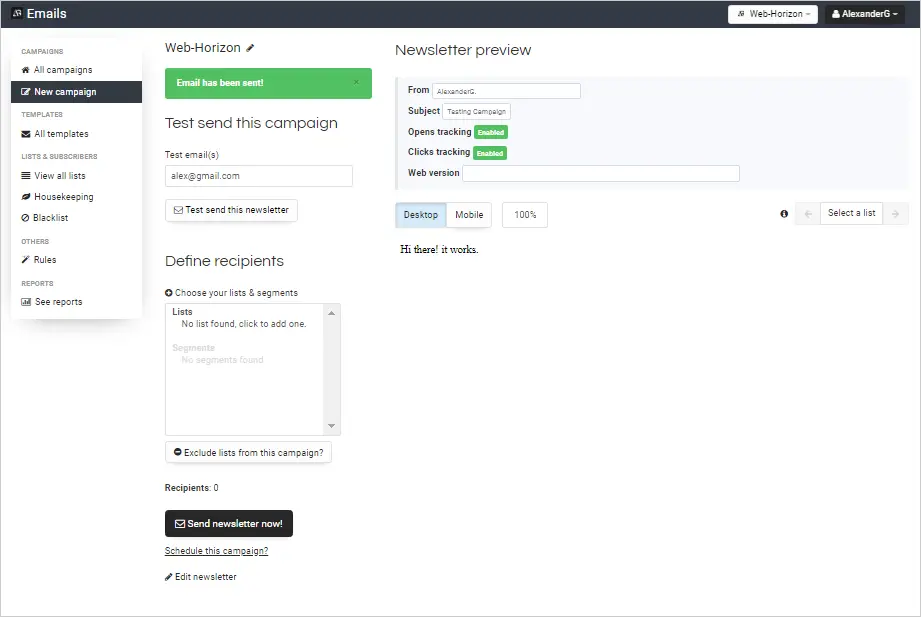
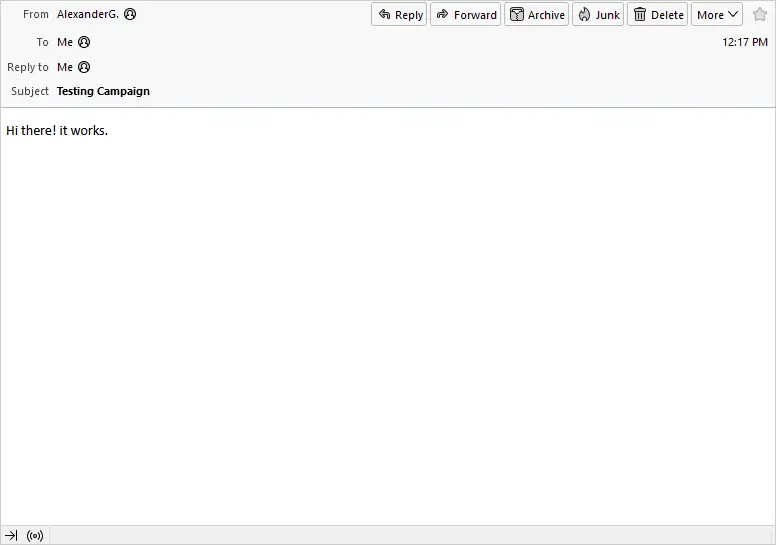
Results:
That test email arrived right into my Gmail email address inbox.
Conclusion:
These custom SMTP servers can be a good alternative to Amazon SES, which is the main feature of Sendy. Amazon SES can be very cheap plus its high delivery IP Address, it is, I believe, the best way to send Emails massively. However, to those who doesn’t have an Amazon SES account and have small email lists, a custom SMTP server is somewhere to start. Be aware that these email hosting accounts are limited by 300 emails per hour / 7200 email per day, even with these limits, it will do the work.
Don’t forget to check Web Horizon amazing deals here.